Getting a Perfect 30-Second ECG Recording
A perfect 30-second ECG recording requires proper skin preparation, correct electrode placement, and remaining completely still during the test.
Most recording failures happen due to poor skin contact or movement artifacts, but these issues are easily preventable with the right technique.
Why 30 Seconds Matters for ECG Quality
Your heart needs time to show its true rhythm. A 30-second recording captures multiple heartbeats and reveals patterns that shorter recordings might miss.
I found that most cardiologists prefer 30-second strips because they provide enough data to spot irregular rhythms. The American Heart Association recommends this duration for basic rhythm analysis.
What Happens During Those 30 Seconds
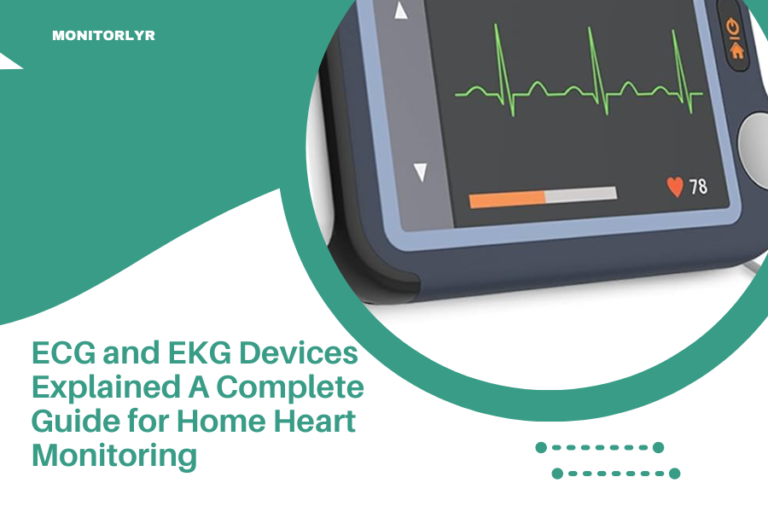
Your ECG device records electrical signals from your heart. Each heartbeat creates a unique wave pattern on the screen or printout.
During 30 seconds, your heart typically beats 25 to 50 times. This gives doctors plenty of data to work with.
Preparing Your Skin for Perfect Contact
Clean skin makes all the difference. Oils, lotions, and sweat block electrical signals and create fuzzy recordings.
The 3-Step Skin Prep Process
Start by washing the electrode areas with soap and water. Pat dry completely with a clean towel.
Remove any chest hair where electrodes will go. Even light hair can interfere with contact. Use a disposable razor for best results.
Wipe each electrode site with rubbing alcohol. Let it air dry for 30 seconds before applying electrodes.
Common Skin Prep Mistakes to Avoid
Don’t use lotion or moisturizer before your ECG. These products create a barrier between your skin and the electrodes.
Avoid using baby wipes or makeup remover wipes. They often leave residue that interferes with recordings.
Electrode Placement Made Simple
Proper electrode placement follows a standard pattern that works for everyone. Get this right, and your recording quality improves dramatically.
The Standard 3-Lead Placement
Place the right arm electrode below your right collarbone, near your shoulder. The left arm electrode goes in the same spot on your left side.
The ground electrode sits on your lower left chest, below your heart. This creates a triangle that captures your heart’s electrical activity.
Visual Landmarks for Perfect Placement
Use your collarbone as a guide for the upper electrodes. Place them about two inches below the bone, on flat muscle areas.
For the chest electrode, find your lowest left rib and place it there. This spot usually gives the clearest signal.
12-Lead ECG Electrode Positions
More advanced ECGs use 12 electrodes for a complete heart picture. The chest electrodes follow specific anatomical landmarks.
Research from cardiology journals shows that even small placement errors can change your ECG results (Journal of Electrocardiology).
Chest Lead Placement Guide
| Lead | Position | Landmark |
|---|---|---|
| V1 | 4th intercostal space | Right side of breastbone |
| V2 | 4th intercostal space | Left side of breastbone |
| V3 | Between V2 and V4 | Midway point |
| V4 | 5th intercostal space | Mid-collarbone line |
| V5 | Same level as V4 | Front armpit line |
| V6 | Same level as V4 and V5 | Mid-armpit line |
Creating the Ideal Recording Environment
Your surroundings affect your ECG quality more than you might think. Small changes to your environment can eliminate most recording problems.
Electrical Interference Sources
Turn off nearby electronics like phones, tablets, and laptops. Their electromagnetic fields can create wavy lines on your ECG.
Stay away from fluorescent lights and electrical outlets during recording. Even electric blankets can cause interference.
Optimal Room Conditions
Choose a quiet, comfortable room where you won’t be interrupted. Temperature matters too – being too cold makes you shiver, which ruins recordings.
I found that rooms between 68-72°F work best for most people. You want to be comfortable without being too warm or cold.
Body Position and Breathing Techniques
How you position yourself during the recording can make or break your results. Small adjustments in posture create big improvements in signal quality.
The Perfect Recording Position
Lie flat on your back with your arms relaxed at your sides. Don’t cross your legs or arms during the recording.
Support your head with a thin pillow if needed. You want to be comfortable enough to stay perfectly still for 30 seconds.
Breathing During ECG Recording
Breathe normally, but avoid deep breaths or holding your breath. Your chest movement affects the electrodes and can distort the reading.
Some people get nervous and breathe too fast. Try to relax and let your breathing settle into its natural rhythm.
What to Do If You Feel Anxious
It’s normal to feel nervous before an ECG. Your heart rate might be higher than usual, but that’s okay.
Take a few minutes to relax before starting the recording. Close your eyes and focus on slow, steady breathing.
Timing Your Recording Right
When you take your ECG can affect the results. Your heart rhythm changes throughout the day based on activity, stress, and other factors.
Best Times for ECG Recording
Morning recordings often show your heart’s baseline rhythm. You’re typically calm and haven’t had caffeine yet.
Avoid recording right after exercise, meals, or stressful situations. These can temporarily change your heart rhythm.
How Long to Rest Before Recording
Sit quietly for at least 5 minutes before starting your ECG. This lets your heart rate return to its resting level.
If you’ve been walking or climbing stairs, wait 10 minutes. Your heart needs time to slow down to its normal pace.
Troubleshooting Common Recording Problems
Even with perfect preparation, sometimes recordings don’t turn out right. Here’s how to fix the most common issues.
Dealing with Noisy or Fuzzy Recordings
Wavy, unclear lines usually mean poor electrode contact or electrical interference. Check that all electrodes are firmly attached to clean, dry skin.
Replace old electrodes if they’ve lost their stickiness. Most electrodes work best when they’re fresh and properly stored.
Fixing Baseline Drift
When your ECG line wanders up and down, it’s called baseline drift. This happens when you move during recording or breathe too deeply.
Start over and focus on staying completely still. Even small movements can cause this problem.
Handling Muscle Artifact
Muscle tension creates spiky, irregular patterns on your ECG. This is different from your heart rhythm – it’s electrical activity from tense muscles.
Relax your shoulders and arms completely. Let them go limp against the surface you’re lying on.
Device-Specific Tips for Better Recordings
Different ECG devices have their own quirks and optimal settings. Understanding your specific device helps you get better results.
Smartphone ECG Apps and Devices
Phone-based ECG devices usually require firm, steady contact with your fingers or chest. Clean your hands before touching the sensors.
Keep your phone steady during recording. Even small movements can affect the quality of smartphone ECG readings.
Wearable ECG Monitor Settings
Wearable devices like smartwatches work best when the band is snug but not tight. You should be able to slide one finger under the band.
Clean the sensors regularly with a damp cloth. Sweat and skin oils build up over time and reduce accuracy.
Professional-Grade Portable ECGs
If you’re using a medical-grade portable ECG, check the battery level before recording. Low batteries can cause poor signal quality.
Make sure the device is calibrated according to the manufacturer’s instructions. Most devices need periodic calibration for accurate readings.
Reviewing Your ECG Recording
Once you have your 30-second recording, you need to know what makes it good quality. Here’s what to look for.
Signs of a High-Quality Recording
A good ECG has clear, sharp waves without fuzzy or wavy lines. The baseline should be flat and stable between heartbeats.
You should be able to see distinct P waves, QRS complexes, and T waves for each heartbeat. These look like small hills and valleys on the printout.
When to Retake Your Recording
If your recording looks noisy, has missing beats, or shows irregular artifacts, take it again. It’s better to spend extra time getting a clean recording.
Don’t settle for poor quality results. A bad recording can lead to misinterpretation of your heart rhythm.
Conclusion
Getting a perfect 30-second ECG recording comes down to good preparation and staying still. Clean your skin, place electrodes correctly, and create a quiet environment free from electrical interference.
Remember that practice makes perfect. The more ECG recordings you take, the better you’ll get at the process. Don’t get discouraged if your first few attempts aren’t perfect – even healthcare professionals had to learn these techniques.
Your 30-second window is valuable time for capturing your heart’s electrical activity. Take it seriously, follow these steps, and you’ll get the clear, accurate recordings you need for proper heart rhythm analysis.
How long should I wait between ECG recordings?
Wait at least 2-3 minutes between recordings to let your heart settle. If you’re taking multiple readings for comparison, space them 10-15 minutes apart for the most accurate results.
Can I take an ECG recording if I have a pacemaker?
Yes, but your ECG will show pacemaker spikes along with your natural heart rhythm. Tell your doctor about your pacemaker when sharing ECG results, as the interpretation may be different.
What should I do if my ECG device keeps showing error messages?
First, check that all electrodes are properly attached and making good skin contact. Replace old electrodes, clean the device sensors, and make sure you’re following the manufacturer’s placement instructions exactly.
Is it normal for my ECG to look different at different times of day?
Yes, your heart rate and rhythm can vary throughout the day based on activity, stress, caffeine intake, and natural circadian rhythms. This is why doctors often want multiple recordings taken at different times.
How do I know if my 30-second recording captured enough heartbeats?
Count the number of heartbeats in your recording – you should have at least 15-20 beats for a useful analysis. If your heart rate is very slow and you have fewer beats, consider taking a longer recording if your device allows it.